Are you wondering how to build a lean-to shelter? Building a log lean-to shelter was a fun construction project that took the entire spring. I didn’t know how-to build a lean-to shelter before, so it was a privilege to take part in this. I hope the lean-to shelter will serve its neighborhood for years to come. This lean-to shelter is privately owned, so I cannot share its location. But I hope you enjoy my short description of the construction project. This type of small structure doesn’t usually require permissions in Finland, but this is something that has to be locally checked. The land is also privately owned, and while everyman’s rights give you the right to walk in anyone’s forest in Finland, cutting down trees and building a shelter requires land owner’s permission.
Selecting the location, carving the logs and deciding the shape
We selected the location at the top of the hill and cut down few trees, making way for the shelter. Peeling the logs manually and carving the ends to make them fit together were probably the most time-consuming parts of this construction. Usually, you would peel the logs twice, for a smoother finish, but we didn’t bother to do that this time. Carving the ends takes skills that are traditionally passed on from generation to generation. The carving styles also vary within the regions.
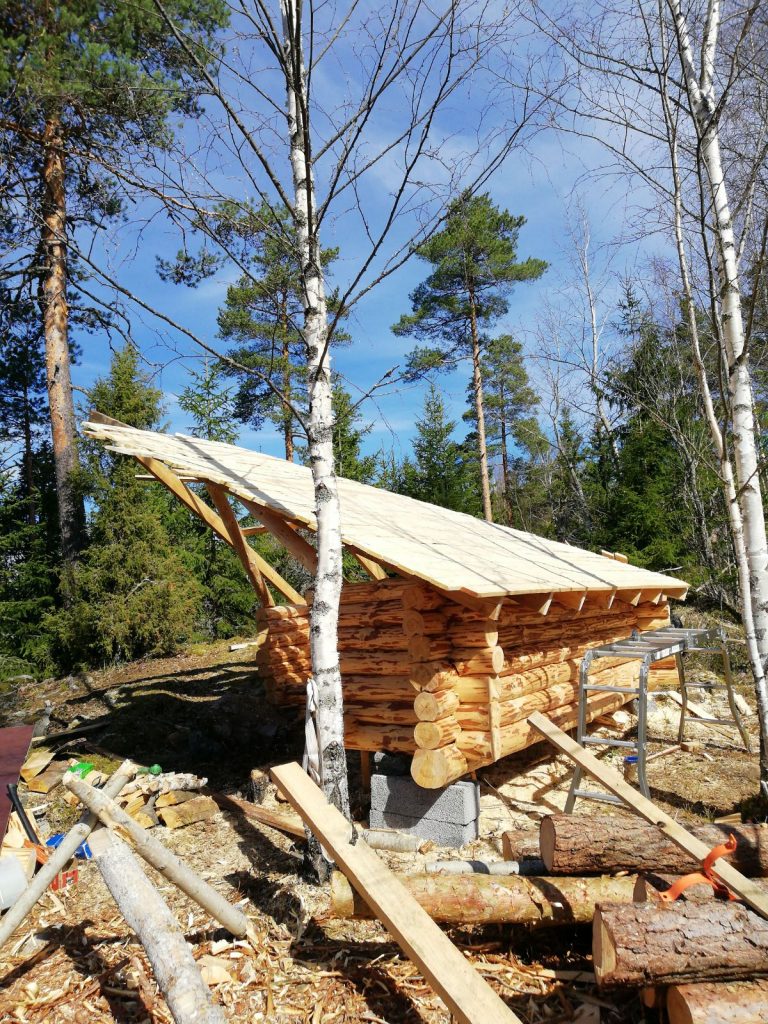
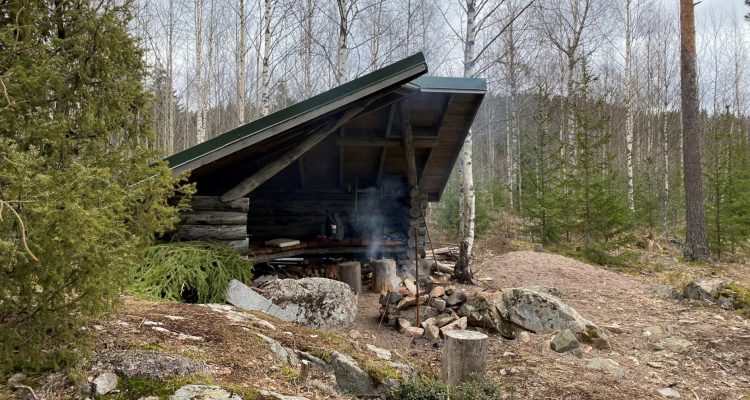
Typically, lean-to shelters are open on one side and have enough space for several people to sleep in. This lean-to shelter was mainly meant to be used as a barbeque hut for day trips, and it is therefore shaped like an L. It is lifted from the ground with construction tiles, which were later switched to rocks.
How to build a roof for the lean-to shelter
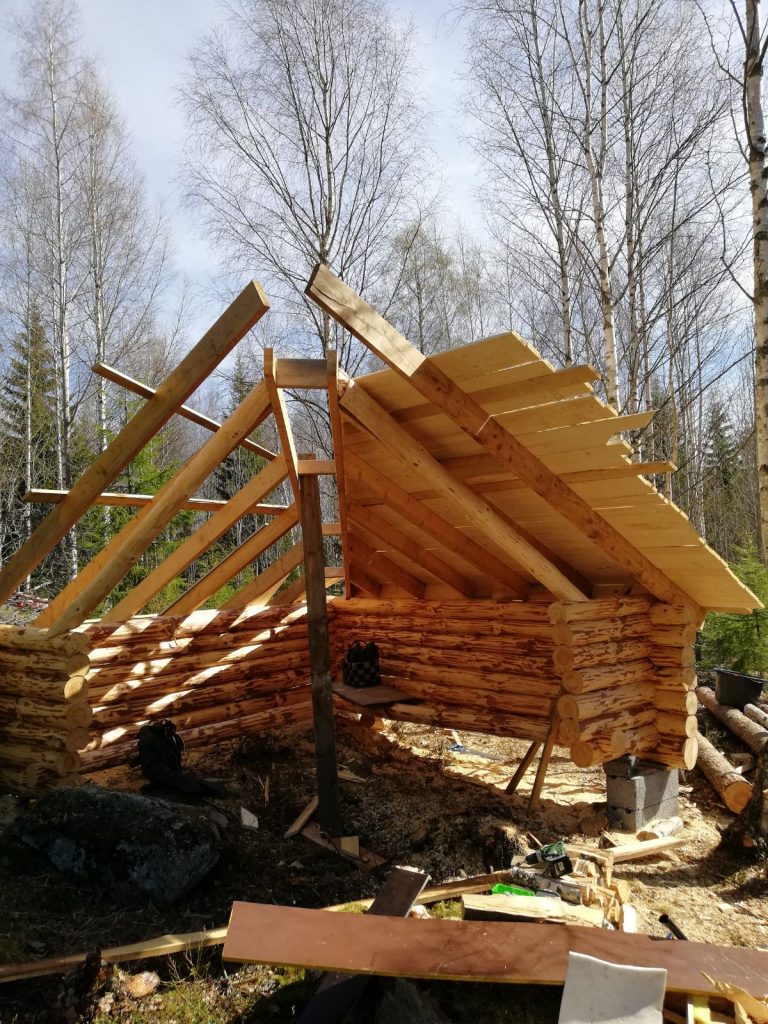
For the lean-to roof we first supported the structure with a beam in the middle and made the roof frame with planks. The green profile metal sheets were then screwn into the frame and finished with molding. We figured grey lean-to shelter with green roof would best blend in to the forest and look nice at the top of the hill.
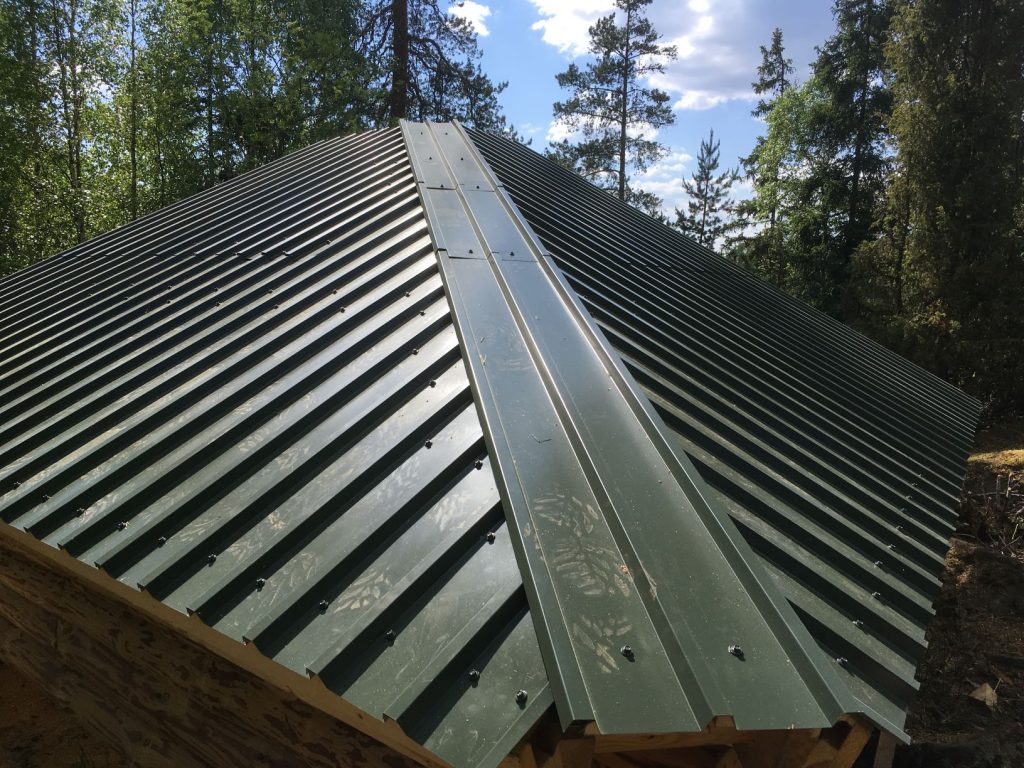
The roof is pretty steep in order to allow snow to slide off better – something you need to take into consideration in Finland. The support beam was removed later and the roof is standing on its own. Apparently. We weren’t really sure about it, since our construction team didn’t include any structural architects!

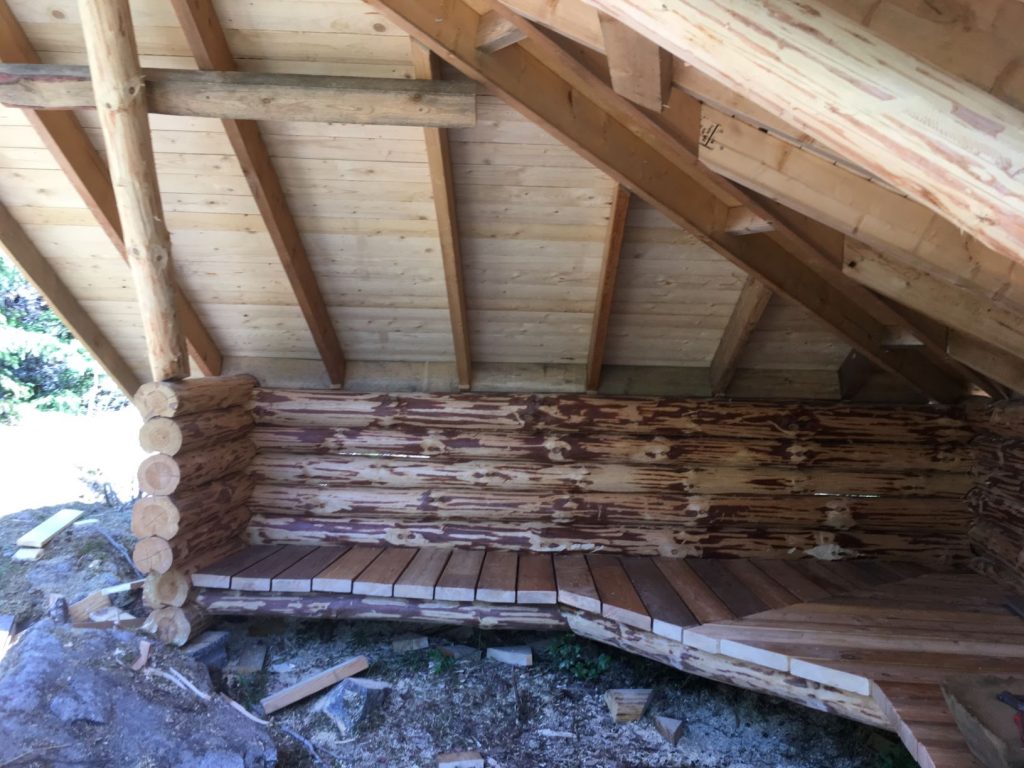
Final touches for the log lean-to shelter – benches and fireplace
Inside of the shelter we built benches that are wide enough to sleep on. Fireplace was placed in front of the shelter between two big rocks. We also brought some sand and gravel to the ground in front of the shelter to make the fireplace safer.
The lean-to shelter has been in frequent use since it was finished. Although I think we visited this location much more often during the construction phase.
Sometimes the journey itself is more important than reaching the destination.
If constructing a DYI lean-to shelter in the woods is not your cup of tea or you don’t own a land where you could do that, you can still enjoy many public lean-to shelters along nature trails all around the country. There are lean-to shelters literally everywhere in Finland. Check out for example these posts in our site. Lean-to shelters are usually provided to us free of charge, so we want to keep them clean and protect them for generations to come. So, no trash, no carving or writing your name on it unless there is a guest book, no reckless smoking and no setting fire when forest fire warning is on. Take care of the lean-to shelters like they were your own.
Check out also these posts about other DIY projects
- If you are interested in our other DIY projects, read about building an insect hotel for the garden. If you have a garden, spring is the perfect time to build the insect hotel.
- Do you want to know how to make a DIY birdhouse from a log? There is always space for more birdhouses!
- We have also investigated how to make a DIY butterfly feeder and other ways to attract butterflies into the garden.